Showing posts with label work. Show all posts

Friday, July 19, 2013

"Yerrrrrrrrrrrr OUT!"

The voters have weighed in, and I'm out of the Battle of the Beadsmith competition. My piece fell to a spectacular entry and I wish Kris Empting-Obenland much luck with the remainder of the challenge.  Now I can sit back, relax, and enjoy the fun as I get back to work on smaller pieces.

Currently, I am busy working in black and white.  I made a number of cabs, large and small, for bead embroidery projects.  Once the beads are out, I thought I might as well do them all at once.

Here is what my worktable looks like today:


Originally, I had planned to use some super-sparkly AB Swarovski crystal bicones in these projects but I couldn't find them anywhere in my studio. It was driving me mad.  I gave up looking and finished the beading without the sparkles. It turns out I had over-organized my space. Last year, I decided it would be smart to create project boxes: cabs would be stored with the beads I had in mind for them, labeled, and stored where I could easily see the labels. One of those boxes held black and white cabs.... and those danged crystals! When I made the new black and white cabs shown above, I completely forgot about the existing box! What a knucklehead.

Thanks to a dear old friend, Paul Hallinger, I've now been diagnosed accurately with BOSS (Bead Over-organized Stress Syndrome) HA! :D

I hope to have several pairs of earrings ready to put in my Etsy shop by the end of the weekend.


 copyright 2013 Shibori Girl

Sunday, June 09, 2013

Masaya, Goddess of Volcanoes

The Battle of the Beadsmith 2013 is well underway; there is an eclectic mix of styles and skill sets represented so far. If you want to follow the action, click here. At the top of the page is a "photos" link which, if you click it, will take you to the albums of each battle.  This year, the public is welcome to vote. If you would like to vote, click the "files" link and look for the document outlining the steps.

Now that my battle is published, finally, I can show photos here.

"Masaya" (Goddess of Volcanoes)
 My piece began with the creation of the yellow polymer clay cabochons. When I use the "inside out bead" or "Natasha" bead technique, the final result is a random, mysterious surprise.  In this case, I cleaned up my work table after a particularly productive day and used the leftover clay scraps to make some cabs.  When I opened the resulting log of patterned clay, my reaction was, "OMG, I need to save these for my Battle piece!"  (The two on the bottom of the finished necklace.)


Rich, vibrant texture and color was a great starting point. When it came to design, there was a lot to consider. I wanted to add a new skill and the bead-embroidered collar on a brass blank was something I've been meaning to try for a couple of years. I stitched down row-after-row, layer-upon-layer to create the final richly textured collar.


As I began embellishing the two clay cabs, it became obvious that this necklace wanted DRAMA: color... sparkle... texture... the thing practically screamed, "Gimme!" When that section was complete, my plan was to connect it to the collar and call it done.  My dear friend, Mikkey, looked at it and told me it was "very nice, but it won't have a chance at winning... not big enough". Nice. NICE?!? I wasn't going for "nice" here. I wanted to do something epic, something that would rival anything I've done to date. Clearly, it was time to go back to the studio and try to make some more cabs - a difficult thing to do when using a scrap technique. I did my best and came up with some similar pieces which matched well.

In a previous post, I referenced how the individual components didn't fit together properly when they were ready for assembly. I love the final configuration. The first piece is now at the bottom, the new cabs seem to soar from the top and follow the lines of the wearer's collarbones perfectly. Normally, the brass collar blank would have enough tension in it to hold the necklace in place without a clasp. But the final piece was so heavy that it slid right off my neck! I added a pretty handmade clasp at the back with a gold-filled hook and it looks lovely from the back.

 When the neck piece was finished, I still had time left and a couple of the yellow cabs were yet unused.  I went ahead and made a matching cuff and hair accessory. The hair comb was another thing I've been meaning to try for a while now.


All told, a huge quantity of supplies and 250 hours of time were consumed in the process of creating this project.

There were some good lessons for me here:
  • Bigger can be better
  • Don't give up if the original plan goes awry
  • Test your limits. You don't know what you are capable of if you don't try.
 ~~~
I owe a huge debt of gratitude to a number of people who helped me get through this project:
  • Sherry Serafini and Heidi Kummli for the outstanding instructions for covering a brass collar in their book, The Art of Bead Embroidery
  • Steven Weiss, from The Beadsmith, for inviting me to participate in the contest
  • Mikkey Tarantino for her enthusiastic input and suggestions; I still have her footprints on my backside from when she convinced me to go huge!
  • Rebecca McElroy, Jack Jitsu, and Jenn Ryan of Dr Cowlick's Photography in Raleigh, NC for the gorgeous photos. You guys rock!
  • and (I saved the best for last) my darling Marble Man, who has had to listen to me talk about this thing for months and never asked me to stop. Thank you!!!
Now... what's next on my bead tray?

copyright 2013 Shibori Girl

Monday, May 20, 2013

Re-evaluate, Repurpose, Re-use

The time  is at hand: that moment when I look at my large inventory of completed works and conclude that some of those early pieces are never going to sell, no matter how many times I relist them on Etsy, or put them out at shows. They have undergone many photo upgrades and price reductions to make them enticing, but nothing is going to make them budge toward a new home.

There is nothing wrong with these early jewels; they are very simple in design and skill requirements - simple stringing really.  It's time to cut bait and reuse as many of the materials as I can in something more elaborate, new, and exciting.

The first piece to face rehab was this three-strand pearl and muscovite necklace made back in 2006.  I liked the pattern of the glittering plum purpley-brown muscovite beads at the center and vowed to keep that feature in the new version.  Lucky for me I have more of the muscovite in my bead stash! I made some pretty bead embroidered motifs to connect the pearl strands together, then added a fancy box clasp. I think it is a big improvement, fitting in with my "more is more" philosophy of late. You can see more information in the shop listing.


 Next up to face my nippers and deconstruction was this carnelian and hessonite garnet necklace, also from 2006.There was a lot about this one I wasn't happy with: a single strand of the red carnelian rounds which wasn't long enough to show at the front when worn, the thick cluster of strands of the brown and amber-colored garnets which was too long to hang asymmetrically as planned, etc.  I also had a LOT of extra carnelian beads, and by "a lot" I mean A. LOT.

So, how do I fix this one? That was my conundrum.


A big fan of chunky ethnic-style jewelry, I recently saw some pieces by the very talented Faria Siddiqui online. She combines big, bold stone beads with delicate bead embroidery to great effect. I raided my bead stash and found a large, deep red carnelian oval cabochon and some funky paua shell oval beads. My vision for a new and better piece took hold.  Add in some dyed blue agate rounds and gold-plated accent beads and what do you get? A big, beautiful, bold new statement necklace. I used up most of the carnelian rounds I had in stock (yay!) so I am happy with this necklace on a number of levels.

You can find the shop listing here.


I have a huge quantity of large stone beads leftover from those early days of jewelry making. At that time, my hand was in recovery and I didn't have the dexterity to use more delicate beads. As I regained strength, and my skill set expanded, I moved onto tinier and tinier beads, leaving the big ones to languish in their drawers.

Adding another layer to my current thought processes, my Battle of the Beadsmith 2013 piece is large and very intricate. It took nearly 250 hours of high-powered intensity beading to complete. This process was fairly ruinous to my hands and wrists, so I can see more pieces like the carnelian necklace in my near future. A little touch of bead embroidery and some big chunky beads to fill out the piece. Just until my hands settle down again.

Now which pieces want reworking?? Stay tuned...

copyright 2013 Shibori Girl

Friday, April 26, 2013

Color Play

I finished my Battle piece this week. Or, at least I THINK I finished it... some tweaking may be required between now and May 11th, which is when I scheduled a professional photo shoot to immortalize the piece.

Today I moved onto something that has languished in my project graveyard for at least a year. I've put off starting it because I want it to be a statement piece and up until now it seemed like it was going to be a "big project". That is, until I made my Battle piece, which is a heck of a lot bigger than anything I'd envision before!

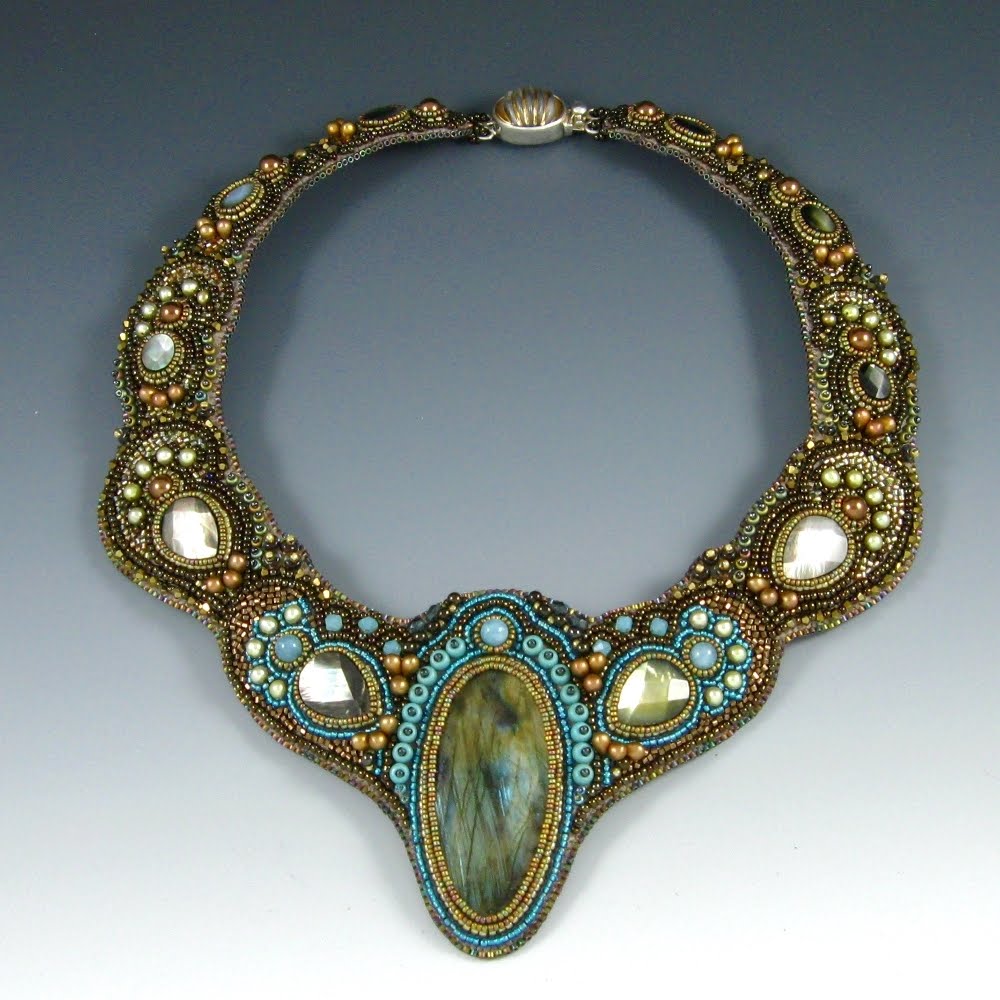
I dug out the box of supplies I'd set aside and got to work.  So far, it is a symphony of subtle colors in bronze, gold, teal blue, and olive green. The focal bead is a glorious Labradorite teardrop cabochon which shimmers with all of those colors I mentioned.  I foiled the cab before glueing it down and those colors shoot right out of the stone now. Wow. 


My current plan is to flank the center stone with gray mother-of-pearl beads and seed beads. I also would like to incorporate some lovely blue and green dyed pearls a friend gifted to me last Fall.  When I laid the pearls down near the work this morning, I felt all sorts of warm sparkly feelings.  It's going to be a gorgeous collar when it's done.


Stay tuned...

copyright 2013 Shibori Girl

Thursday, August 25, 2011

One Ringy-Dingy...

I've been working solidly this past week with polymer clay after I sold several pieces while we were on vacation. Katie's Traveling Trunk Show strikes again - I just love how my work seems to sell itself.


To get back into the groove, I started pawing through the various canes I've made over the past two years. Some of them are pretty old so I thought I'd try making some little ring bowls to use them up. I've wanted to make these sweet little bowls for a long, long time so, armed with this tutorial, I got to work.


I made four the first day, and I have to ask, "Why is it, that each new thing I try is more fun than the LAST new thing I tried?"


I enjoyed the process of putting those four together, and today I added another seven to my stock.


Each one is unique.


In the process I've used up a few canes that have been hanging around since my early days of clay experimenting.


I'll be offering these little beauties for sale soon once I've built up some inventory. In the meantime, you can find me up to my eyeballs in patterns and color...

copyright 2011 Shibori Girl

Tuesday, July 19, 2011

Passionate For Purple

I promised pictures of the polymer clay pieces made from my first attempt at mokume gane. As I gathered them all together for their glamour shots in the light tent, I realized... that's a whole lot of purple going on there.


Each necklace is reversible, which I think is a great selling point - two necklaces for the nice (low) price of one.


I need to make two halves of each bead anyway, and it doesn't take that much more effort to make the second side slightly different than the first.


As with the brocade pattern I referenced in my last post, I didn't want to waste any of the trimmings from my round beads. I put together this great pin using those curvy leftovers. And, of course, MORE purple! I think it came out very well.


Of course, I finished out the session with swirlies made from the scraps!


While those pieces were baking, I took time to finish some more brocade design stuff. Earrings:


And another pin, this one is considerably smaller than the previous ones:


I'll be spending the next few days listing these in my shop so be sure to stop by often to check them out.

copyright 2011 Shibori Girl

Sunday, July 17, 2011

Polymer Clay Play Time

Since returning from Canada, I've been in the studio learning new surface design techniques with polymer clay. I've had this book for some time but needed a good stretch of designated quiet time to crack it open. My favorite technique so far: a brocade look using gold leaf and acrylic paint. I also tried my hand at mica shift, which is very cool...


There's a lot of work in the brocade technique, so I didn't want to waste any of it. I used the curvy trimmings from the bead to make this pretty fan pin.


I purchased a couple of really wonderful tutorials from Naftali Studios for making hollow lentil beads and crackle finishing. These are very well-designed tutorials with clear instructions and good photos. I followed the crackle finish tutorial and decided to use the instructions verbatim. My finished result looks just like her design. Once again, I made it reversible - two necklaces in one... I love that!


Because the bead is hollow, it's very lightweight and comfy to wear. Now to use the technique to make beads in my own design.

This weekend I did my first attempt at mokume gane. I just love it when I can take out my aggressions on an inanimate block of clay. My first successful sheet of mokume gane:


I've got a bunch of beads half done, so I'll be posting those images soon. I'll have some of these new pieces listed for sale in my Etsy shop this week. Until then, you can find me in my playroom.

copyright 2011 Shibori Girl

Friday, June 10, 2011

"Lentil Soup"


I went back to working on "swirlies", those big, gorgeous polymer clay lentil beads that I fell in love with last year.


Since my last post, I've been struggling with a couple of issues. The biggest is a nagging pain in my wrist. My first thought was to do what Marble Man calls "rub some dirt on it and walk it off". I went and bought a carpal tunnel splint at the local drug store, which helped, but the pain was still hanging around a couple weeks later. My doctor told me it's not carpal tunnel syndrome (Whew - my worst fear!) but tendinitis. He said it's OK to use it, just not to the point of discomfort.


The small, twiddly work I like so much will have to wait. Enter: Swirlies. They are so much fun, that I may need an intervention!


Just like when making lentil soup to eat, you throw a little of this and a little of that into the pot. With these beads, a little bit of monarch butterfly wing, flower petal and leaf cane slices, etc, you wind up with an interesting and spicy result.
~~~

The other issue which is bothering me is that when I look through my Etsy shop, it seems a bit like a split personality is running it. There's intricate bead work,


modern-looking clay pieces,


vintage inspired work, etc.


It looks like I can't decide what I want to do, when in reality, I just have lots of styles for lots of moods.

When I look at other shops, there's a sense of cohesion, a mature style with variations. Do I need to set up different shops for each style of work I do? What would you suggest?

copyright 2011 Shibori Girl

Saturday, May 07, 2011

Polymer Clay Meets Silk Ribbon Embroidery...

... Or how a long lost passion gains new life in my studio. When I was dyeing fabric and creating wearable art, I used silk ribbon embroidery to embellish a lot of my garments.


I loved doing it: pulling the ribbon through the fabric, laying it flat, forming the stitch, pulling it back through the fabric again. Then gently coaxing the loops and folds into shape... instant beauty. Repeat.


I had my Beauty Blinders on, so I didn't see the unthinkable coming my way - the accident that changed my creative life forever. Afterward, my hand stopped working the way it should. No more pulling ribbon through fabric. It wasn't fun anymore, wasn't worth the discomfort. I put the ribbons and big-eyed needles away.


Enter my new passion - polymer clay. I began this new journey in a big way: lots of color, big canes that took all my strength to reduce down. I'll get back to doing that later on, but now I want to work small... very small.


I just need the tiniest speck of clay to create something resembling that old silk ribbon embroidery.


Little malleable balls of color lined up on my table, patience, and some quiet time, are all I need to recapture the joy I felt as I formed that perfect stitch.


Magic happens if you wait for it...


copyright 2011 Shibori Girl